

VR GIS
This page updated: June, 2011
AStar Pathfinder
- Status overview, program operation, helpful information, code information
- The first phase is described as the AStar program.
- To do: Include trees and water in the 3D view... although this is becoming a SOS MAP scenario, rather than a demonstration of pathfinding.
Note to self - verify the 3D terrain is 'autoflipped' so it looks the same as the 2D version - which is used for 'planning'.. it is confusing to have the 3D be a 'mirrored' view -versus- the 2D.
- The second phase is to enable unit path coordination to avoid collisions. Keeping Temporal and Spatial scale coordinated will also be required. It seems this will require a LOT more memory. We shall see...
- Third phase : Processing 'real' data into an AStar scenario using DEM, satellite imagery, and vector road-building-hydro-veg-... files. This could probably be done now, making it 'generalized' and automated might take a while. Getting - distributing Data files would also be problematic.
- Modes of operation: the initial program display is the Demo mode. The menu items pertain to it -except- the Tools menu opens the other pages to create terrain and view in 2d and 3D.
- Display the AStar path and its numerology in Demo mode.
- Terrain for 2D and 3D can be created and textured. Terrain values other than Go..NoGo Obstacles can be mapped.
- Display in 2D map mode using GR32 to determine the pathfinding success. View in 3D using Delphi GLScene OpenGL to watch the Actors traverse the terrain.
- Html AStar information, Overall Runnng-Operating instructions, preparing a terrain map, processing the Actors, and running-operating the 2D-3D pathfinding is included with the program.
- Program Code:
- fibonacci.pdf file explains the fibonacci heap.
Lester uses a Binary Heap and thus so shall I.
- Links to free Media. The bare minimum is included- avoids duplicated efforts and Copyright infringement- as they are not made by me - so get them from the source.
- Actors : Get a good selection .. at a minimum 5 favorite actors and 1 enemy. These are used to look at as they move-run around, there is no shooting or dieing provided here (no sound either). Collect in each actors folder within the Actors folder. They are used in AStar, can be viewed in GLSViewer, and run around on SOS MAP projects. As of May 2011 many actor file links are broken. Actor-Flag-July2011.pdf can be used as a 'checklist' of what is available and a method of organizing Team colors-icons-targets.
- Actor MD2 : planetquake .md2
- After unpacking, collect the files from the model folder and place above - in the actors main folder. All that is needed for any VR GIS 64 program is the md2 files and the skins. Convert skins to .bmp: tris.md2, weapon.md2, actor.bmp, weapon.bmp
- Actor MD3 : planetquake .md3
- MD3 are more complicated: you need the animation.cfg, head.md3, upper.md3, lower.md3, the associated .skin files and the actual skin .tga : converted to .jpg. Some actors have several skin image files and others only use 1 file to skin-paint the complete actor. It seems some .skin files need to be edited-corrected as they have incorrect names for the skin image files. They can be opened and edited using notepad or similar text editor.
- Actor hl2 .smd: hl2 planethalflife .smd
- well gee... these get so complicated they are not actually used. They can be viewed by the GLS Viewer. You need all the .smd, the .QC, .mdl and skins converted to .bmp. At a minimum and for the future: all variants of the idle, walk, run .smd files, the .mdl .qc and all the skins converted to .bmp
- Actors from Quake 4 and Half Life2 and the latest games have become amazing. They are also more than what is needed for their use here. well, that and being complicated. Someday maybe i will create some md2 or md3 actors.. with modern day amounts of polygons and skin sizes...
- Textures: are used to 'paint' the terrain created to make areas of various movement capabilities. Trees, vegetation, grass, rocks, sand, water, roads... for variety get several of each... paul bourke textures"These textures may be freely used as backgrounds, textures in 3D scenes, parts of images, etc but they may not be redistributed as (or part of) a texture collection. " ..
lemog textures ... off line .. Google Textures
- Textures may need to be made tileable.. if the edges do not match. A tile maker is included in AStar. Steve Harman has a Seamless Tile image processing application sTile99 at Torry's : harmtile.zip.
- Images to make 'Flags' : the base and Target cubes that the actors traverse to. Each cube has 6 sides - although only 4 are easily visible. Paint your own or get images you like and will 'represent' the actors you select. They will need to be-or-cropped to 256x256 and or 512x512.
- The program starting screen is the Demo mode. Read the instructions and press some buttons to explore and learn about A* Star pathfinding. Get a lot of textures and Actors. Create a Terrain in the Terrain Sculptor. Make a Project file: Unit Locate and select Base-Targets: select small images (Only the Base textures and Target Flags are needed. Select from the ones provided.. they are simply basic shape-color placeholders) for the 2D view. The position of the Actors starting-base and the Targets can be changed and saved in the 2D view. Redo the Project file and select actual Actors and Base-Flag Cube textures. (Save with a different Project filename) Run the 3D viewer... Experiment and have fun.
- AStar Menu

- File, Search, View, Project, Run, and Help pertain to the Demo Mode application

- Tools (The first 3 are used to 'preview' Actors and terrain tiles. Make the terrain with the Sculptor, then input the data and file names into a Project File. Check it in 2D then watch it in 3D.
- Texture Tilemaker
- Changes the edges of a texture to make it 'tileable' for use in terrain 'painting'
- MD2 Actor viewer...
- View the actors, their skin image, weapons, and the Base and Target cube textures.
- MD3 Actor viewer...
- View the actors, their skin image, weapons
- Terrain Scupltor...
- Create the terrain and 'paint' IAW the terrain values.
- Project File...
- Selection of the files that comprise a project. Terrain, image, data values, Actors...
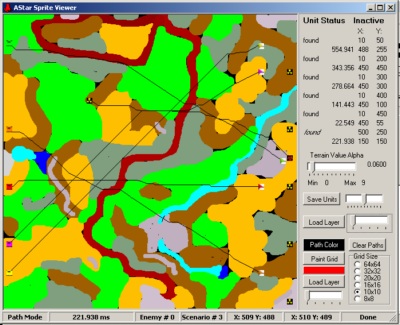
- 2D Sprite Viewer...
- 2D (overhead) view to allow checking the pathfinding speed and actual path that was determined.
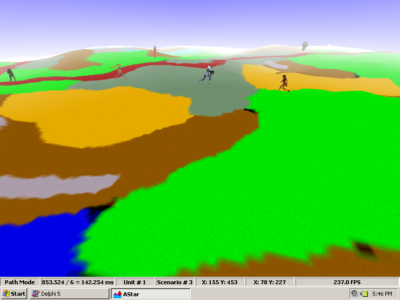
- 3D Terrain Viewer...
- Watch actors traverse the terrain... the Glorious Graphic
- 4D Terrain Viewer...
- Watch actors traverse the terrain... 4D is similar .. yet different than 3D Viewer. Many 'optional' activities do not exist, yet the advanced development will occur here... Phase 2.

Astar 2D Demo mode screen

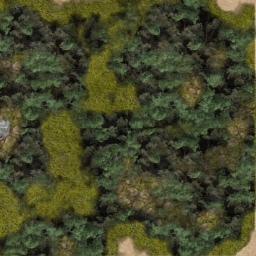
AStar 3D terrain texture... Slope and other terrain factors affect the path values

Astar sprite viewer for previewing and testing that paths work

AStar 3D terrain with actors running across the 'path values' terrain

 Copyright © 1991..2011 by Ivan Lee Herring


